ある日、こう思いました。
「DBのデータ、ちょこちょこ更新するの正直めんどくさい……」
あるあるですよね。特に更新頻度の高いデータを、いちいちMySQL接続して変更するのはダルい。
なので今回は、ログイン制御されたWebページからDBのデータを更新できるように、Tomcatを使って実装してみました。
制限をかけたいのは /fan/* 配下のページ。
使用バージョンは Tomcat 9。
BASIC認証(超シンプル。でも柔軟性は低め)
「web.xml にアクセス制限領域を設定」して「tomcat-users.xml にユーザーを設定」をする方法でやっていきます。
<security-constraint>
	<web-resource-collection>
		<web-resource-name>Restricted Area</web-resource-name>
		<url-pattern>/fan/*</url-pattern>	<!-- ここに制限したいディレクトリ -->
	</web-resource-collection>
	<auth-constraint>
		<role-name>user</role-name>
	</auth-constraint>
</security-constraint>
<login-config>
	<auth-method>BASIC</auth-method>
	<realm-name>Restricted Area</realm-name>
</login-config>
	<security-role>
	<role-name>user</role-name>
</security-role><tomcat-users>
<user username="admin" password="password123" roles="user"/>
</tomcat-users>すると、web.xmlで指定したディレクトリで
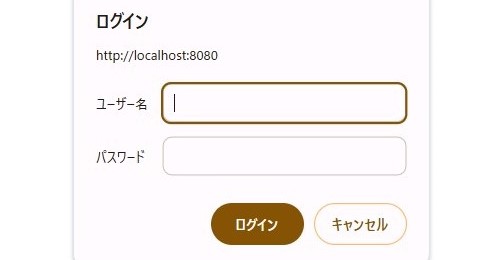
ブラウザのポップアップによる認証画面になります。
これが実装が最も簡単なんだけど、以下のデメリット
- UIがブラウザ依存でカスタマイズ不可
- パスワードを平文で送る(HTTPSが必須)
- DB連携やユーザーごとの詳細制御が困難
- ログアウトが困難(ブラウザのキャッシュによる)
もうちょい、自由度の高い機能にしたいですね。
FORM認証(Tomcat標準。HTMLでログイン画面を作れる)
tomcat-users.xml のユーザーの設定はそのままで、カスタムしたhtmlページでログイン制御を行います。
<security-constraint>
	<web-resource-collection>
		<web-resource-name>Restricted Area</web-resource-name>
		<url-pattern>/fan/*</url-pattern>	<!-- ここに制限したいディレクトリ -->
	</web-resource-collection>
	<auth-constraint>
		<role-name>user</role-name>
	</auth-constraint>
</security-constraint>
<login-config>
	<auth-method>FORM</auth-method>
	<realm-name>Restricted Area</realm-name>
	<form-login-config>
		<form-login-page>/fan-login.html</form-login-page>	<!-- ログインページ -->
		<form-error-page>/login-error.html</form-error-page>
	</form-login-config>
</login-config>
<security-role>
	<role-name>user</role-name>
</security-role>
ログイン制御画面では、Tomcatが予約している "j_security_check" にPOSTするように設定。
<form method="POST" action="j_security_check">
	<input type="text" name="j_username" placeholder="ユーザー名">
	<input type="password" name="j_password" placeholder="パスワード">
	<button type="submit">ログイン</button>
</form>
Tomcatの仕組みを使うので、わりと簡単で、これが正解かもしれない…
けど、db接続とかを考慮すると、server.xmlとかにdb接続設定とか書かなくてはならず、構成を変えなければならず、個人的にはjavaとかで制御したい…
Filter + Servlet + DB(最も柔軟で現実的)
最終的に選んだのがこの方法。
Filterでアクセス制御、Servletでログイン処理、DBでユーザー認証。全部自前で作ります。
<filter>
	<filter-name>AuthFilter</filter-name>
	<filter-class>test.AuthFilter</filter-class>
</filter>
<filter-mapping>
	<filter-name>AuthFilter</filter-name>
	<url-pattern>/fan/*</url-pattern>
</filter-mapping>
/fan/*にアクセスした場合に飛ばす先としてセッションチェックを行うAuthFilterクラスを作成
public class AuthFilter implements Filter {

	public void doFilter(ServletRequest request, ServletResponse response, FilterChain chain)
			throws IOException, ServletException {

		// リクエスト・レスポンスをHTTP用にキャスト(HTTPの機能を使うため)
		HttpServletRequest req = (HttpServletRequest) request;
		HttpServletResponse res = (HttpServletResponse) response;
		// 現在のセッションを取得(存在しない場合は null を返す)
		HttpSession session = req.getSession(false);

		// セッションまたはログイン情報がなければ、ログインページへリダイレクト
		if (session == null || session.getAttribute("fanusername") == null) {
			res.sendRedirect(req.getContextPath() + "/fan-login.html");
			return;
		}

		// 無操作時間をリセット(3分)し、次の処理へ渡す。
		session.setMaxInactiveInterval(180);
		chain.doFilter(request, response);
	}
}
ログインページはこんな感じ
<form method="POST" action="/fanLoginServlet">
	<label>ユーザー名: </label><input type="text" name="username" required>
	<label>パスワード: </label><input type="password" name="password" required>
	<input type="submit" value="ログイン">
</form>
ログイン認証とセッション開始を行うコードサーブレットを作成。
@WebServlet("/fanLoginServlet")
public class LoginServlet extends HttpServlet {

	protected void doPost(HttpServletRequest request, HttpServletResponse response)
			throws ServletException, IOException {

		// リクエストパラメータを取得
		String username = request.getParameter("username");
		String password = request.getParameter("password");

		// ユーザー認証
		if (isValidUser(username, password)) {
			HttpSession session = request.getSession();
			session.setAttribute("fanusername", username);
			session.setMaxInactiveInterval(180); // 3分で自動ログアウト
			response.sendRedirect("/fan/tobishimaProcedure.html"); // 認証成功後のリダイレクト先
		} else {
			response.sendRedirect("/fan-login.html?error=1"); // 認証失敗後のリダイレクト先
		}
	}

	/**
	 * ユーザー名とパスワードを使って、認証を行うメソッド。
	 *
	 * @param username 入力されたユーザー名
	 * @param password 入力されたパスワード(プレーンテキスト)
	 * @return 認証に成功すれば true、失敗すれば false
	 */
	private boolean isValidUser(String username, String password) {
		~ (略)~
	}
}
柔軟に管理したいなら、自前実装一択!
というわけで、Filter+Servlet方式で自由に認証とDB操作ができる構成にしてみました。
誰かの参考になればうれしいです。
次回は「パスワードのハッシュ化」について書くかも?
 みっつー
みっつー